
Introduction to DIY Backyard Fire Pits
Benefits of Building Your Own Fire Pit
Imagine a crisp evening in your backyard, gathered around a warm fire with friends and family. Building your own fire pit offers more than just a source of warmth—it creates a cozy gathering spot that enhances your outdoor experience. DIY fire pits allow customization to your space and style, and the satisfaction of creating something with your own hands adds a personal touch that store-bought options can’t match. Moreover, constructing one yourself is often cheaper and more rewarding than hiring professionals.
Materials That Save Money and the Environment
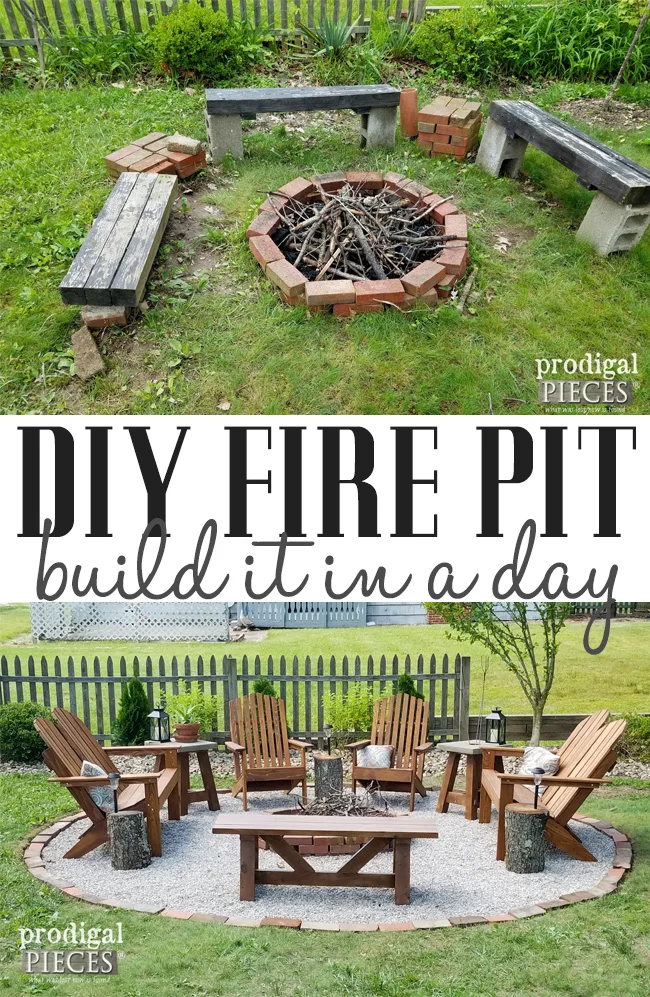
Many people don’t realize that you can build a sturdy, attractive fire pit using inexpensive or recycled materials lying around your home. Old bricks, concrete blocks, metal drums, and even terracotta pots can be repurposed to form the foundation of your fire pit. Using these materials not only cuts down on costs but also contributes to environmental sustainability by reducing waste. This approach allows you to create a functional and eco-friendly feature that aligns with both your budget and green living values.
Planning Your Fire Pit Project
Choosing the Perfect Location in Your Backyard
Planning starts with finding the ideal spot—a place that is flat, away from overhanging branches, and clear of flammable materials. A friend once built a fire pit near their wooden deck and learned firsthand the importance of distance when a stray ember landed on a dry patch of grass. Ensuring a safe location reduces risks and maximizes the enjoyment of your fire pit. Also, consider the view and how you want to arrange your seating, so the fire pit becomes the natural focal point of your outdoor space.
Basic Safety and Legal Considerations
Before you break ground, check your local regulations regarding open fires. Many communities have specific guidelines about size, location, and the times when you can burn fires outdoors. Safety is paramount; this includes ensuring your fire pit is constructed away from structures and includes protective features like a metal mesh cover or a stone barrier. Familiarize yourself with fire extinguisher use and keep tools like a shovel and water source nearby. These precautions prevent accidents and help you enjoy your creation responsibly.
Top 5 Easy Fire Pit Designs Using Recyclable Items
Fire Pit from Concrete Blocks and Old Bricks
Concrete blocks and old bricks are readily available in many backyards after home renovations. One family used leftover bricks from a garden path to build a simple circular fire pit that took only an afternoon to assemble. The sturdy blocks provide excellent heat resistance, and their modular nature means you can customize the size and shape. Lining the base with sand improves stability and heat dispersion, making this design both economical and practical.
Upcycled Metal Drum Fire Pit

Discarded metal drums make great fire pits with a little modification. An example comes from a DIY enthusiast who transformed a rusty oil drum into a contemporary fire feature by cutting air vents and applying heat-resistant paint. The key is ensuring proper ventilation and stability. Because metal conducts heat quickly, placing the drum on a bed of gravel or bricks helps protect the ground beneath. This design offers a portable option for those who might want to move their fire pit seasonally.
Recycled Terracotta Pot Fire Pit
Terracotta pots, often chipped or no longer needed, can be stacked and sealed to form a charming small fire pit. Mary, an avid gardener, repurposed several large pots by arranging them in a tight circle and filling the center with fireproof sand and rocks. This design is ideal for small patios or balconies where larger fire pits aren’t feasible. The natural clay withstands heat well, and the rustic look adds character to outdoor gatherings.
Fire Pit Built with Reclaimed Pavers
Using reclaimed pavers salvaged from old walkways or patios provides a flat, sturdy surface and a polished look. One homeowner revitalized a stack of mismatched pavers to create a square fire pit with a uniform edge by carefully aligning the stones and securing them with mortar. This style blends seamlessly into outdoor living areas and can be adapted to more intricate shapes for those with some masonry experience, making it both functional and attractive.
DIY Stone and Glass Bottle Fire Pit
A creative project involved using smooth river stones combined with recycled glass bottles set in mortar. The glass bottles, topped with a layer of concrete and stones, allowed light to shine through when the fire was lit, creating a magical ambiance. This design works well in artistic yards where the fire pit doubles as a decorative element. It requires attention to detail to ensure safety, but the result is a unique, eco-conscious fire feature that sparks conversation.
Step-by-Step Construction Guide
Tools and Materials Checklist
Before beginning any project, gather all necessary tools and materials. Depending on your chosen design, you might need a shovel, level, hammer, work gloves, heat-resistant paint, mortar mix, and a chisel. Having these on hand prevents interruptions and keeps the process smooth. For recyclable materials, inspect each item for cracks or weaknesses that could pose hazards when exposed to heat.
Assembly Instructions for Each Design
Concrete blocks and bricks require stacking in a circular pattern, securing each layer with mortar if desired. For metal drums, cut vents near the base for airflow, smooth sharp edges, and paint the exterior to prevent rust. Terracotta pots should be arranged securely, often with sealing mortar between layers, and the center prepared with non-flammable filler. Reclaimed pavers need careful alignment and leveling, with mortar applied for stability. Stone and glass bottle fire pits require building a sturdy mortar base and precise placement of bottles to avoid heat damage. Each method benefits from measuring twice and checking levels to ensure a safe, long-lasting structure.
Maintenance Tips for Longevity and Safety
Regular maintenance keeps your fire pit functional and safe. After each use, clear ashes and debris to prevent buildup that can damage materials or block airflow. Inspect bricks or stones for cracks and repair them promptly to avoid structural failures. For metal fire pits, check for rust and repaint as needed. Covering your fire pit during rainy seasons extends its life and prevents weather damage. Above all, always ensure the fire is fully extinguished before leaving the area, maintaining a safe outdoor environment.
Creative Add-Ons and Decorating Ideas
Once your fire pit is complete, consider adding features that enhance comfort and style. Surrounding it with benches made from reclaimed wood creates inviting seating. String lights overhead add a festive glow, while colorful cushions and blankets provide warmth and texture. Incorporating fire-resistant plants nearby can soften the area visually. For a personal touch, use mosaic tiles or paint on the outer surface of your fire pit. These thoughtful additions transform your fire pit from a simple structure into a memorable centerpiece that reflects your personality.


